Showing posts with label DIY. Show all posts

Wednesday, February 4, 2015

Colors of Spring | Styled Shoot

In preparation for Joie Issue 2, we wanted to share the full styled shoot from Issue 1! We weren't able to show the entire shoot in the magazine, so I thought sharing the entire thing here would be a fun thing to do! We had so much fun with this shoot and we hope you enjoy the full collection!


Vendors:
Photography: Stephanie Rita Photography | Boston, MA
Styling: TarynAlyse Weddings+Events | Keene, NH
Hand-painted sign: HeartCrafted Co. | San Francisco, CA
Cupcakes: Cupcake City | Reading, MA
Florals: Whole Foods Market | Wellesley, MA
Hair+Makeup: Kathy Dunbar | Whitman, MA
Dress: La Reine Bridal | Waltham, MA
Lace Chandelier: DIY (tutorial www.julietgracedesign.com)
Dinnerware: Thrifted
Candle Holders: Heirloom
Models: Sarah and Alex
Location: Wellesley College | Wellesley, MA

Thursday, August 14, 2014

Summertime Snacks

Even though the mornings make it seem like fall is on it's way, it's STILL SUMMER! I promise :) I was perusing the internet looking for some delicious summery snacks and came across some that look so good! 

These snacks would be great to serve at a dinner party or an end-of-summer engagement party. They are healthy, fresh and pretty easy to whip up!


Summer Fruit Bruschetta packs a lot of flavor in one little bite! You can even have your guests choose what they want on top. recipe


Cucumber and Mango Skewers are sweet and fresh and colorful all in one. recipe


 Frozen Yogurt Covered Fruit is a fun snack for the kids at the party. Mix up the yogurt flavors and get lots of variety. Maybe even some chocolate for a sweeter option! recipe


Watermelon and Feta is for those with a developed palette (I'm totally stealing terms from the Food Network). I do think this would be tasty! recipe

Comment on this post if you end up trying one of these recipes!

~Stephanie

Tuesday, July 29, 2014

{Easy DIY} Cake or Cupcake Toppers


Today we're bringing you the easiest of easy DIYs! These simple cake or cupcake toppers are great for a wedding, bridal shower, or even a birthday! All you need is: 

- Skewers
- Masking Tape
-Pretty Paper that fits your color scheme
- Acrylic paint that also fits your color scheme
-Paintbrush
-Scissors


Paint the skewers first, so you have plenty of time to let them dry. I used a turquoise acrylic paint for mine. Remember to leave the bottom inch of the skewer unpainted so you can stick it into your cake and not be eating paint later. :)


I set mine to dry on a tissue box, in front of a fan. They took about 15 minutes to completely dry.


Then, trace out the letters, numbers or words you will use onto your pretty paper. I used S and N for mine and my husband's names!

If you aren't confident in your letter-drawing abilities, you can also print from your computer the outline of the letters onto the paper. 

Cut the letters out carefully!


Next, cut strips of masking tape.


And once your skewers are dry, flip your letters over and tape the skewers to the back! On some letters you have to get creative on where to adhere the skewer to not let it show. It's ok if they aren't completely centered! 


Lastly, stick the skewers into the top of your cake or cupcakes and enjoy the cuteness!


We hope you have fun with this easy DIY!

~Stephanie 


Monday, July 7, 2014

{DIY} Twine-Wrapped Vase for your Centerpiece


This is a cute little vase, that is very inexpensive to make and would be great to use as part of a centerpiece for wedding, bridal shower, or numerous other events.

You will need:
-Twine/Hemp
-Double sided craft tape
-Scissors
-Glass Vase
-Ribbon (optional)

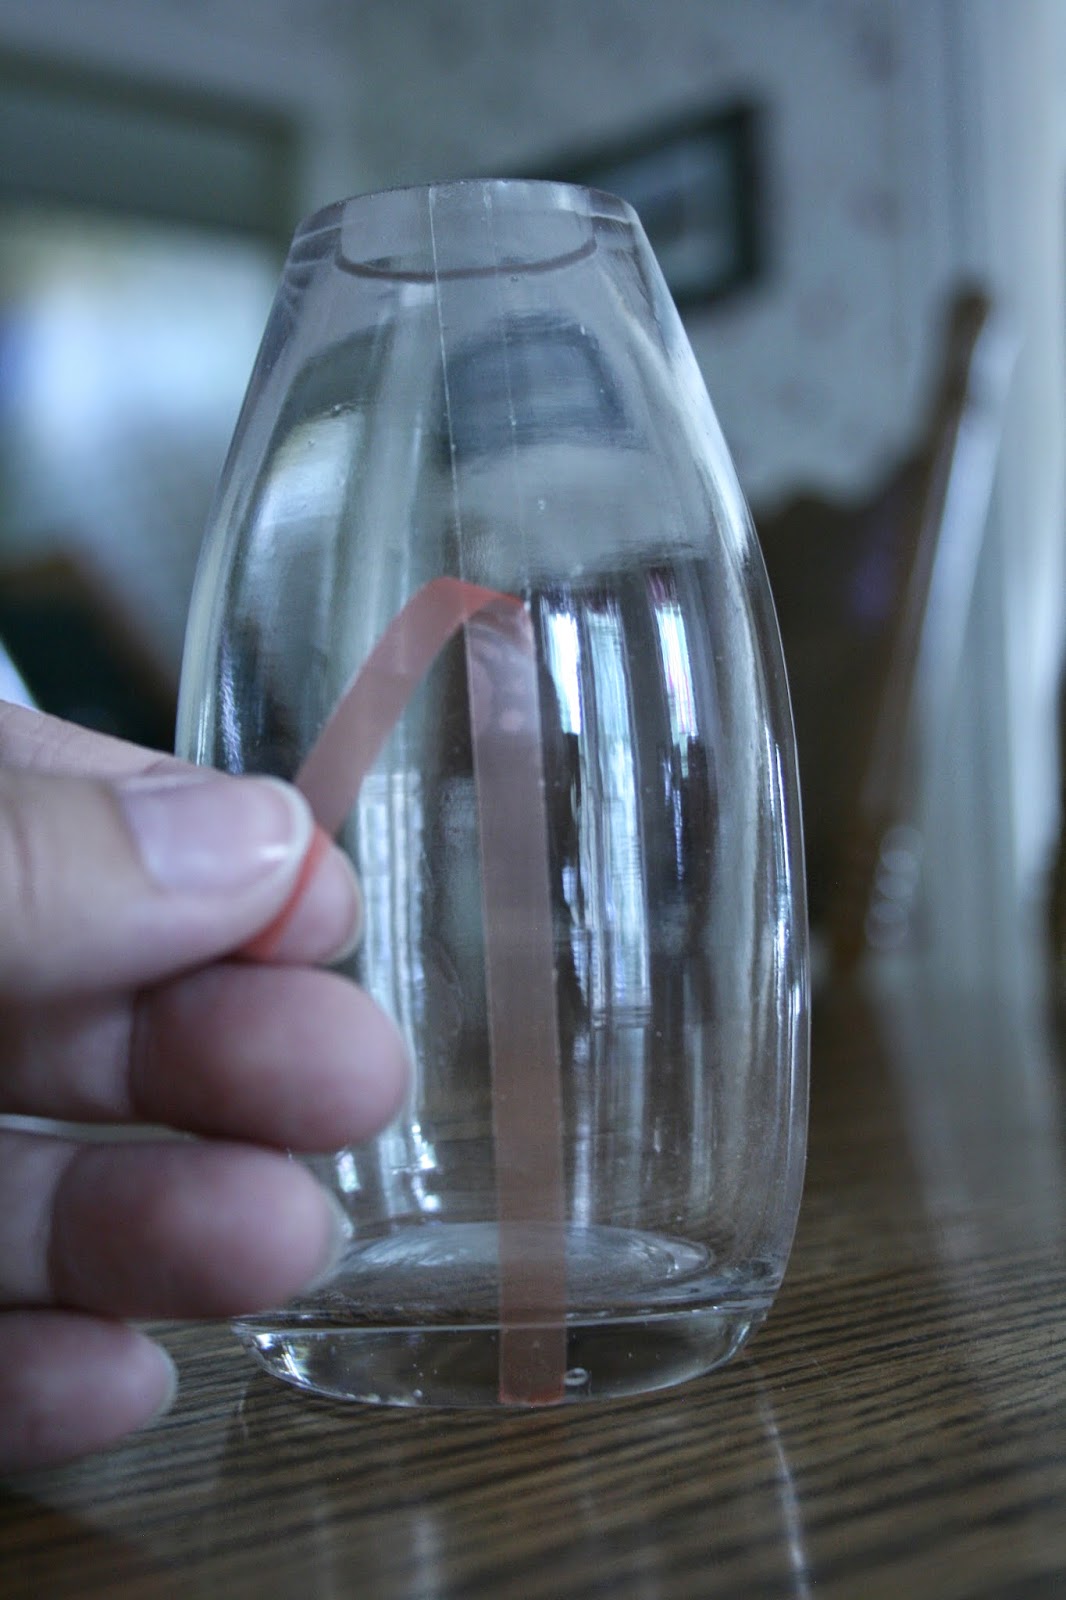
1.) First stick your double sided craft tape in vertical strips across your vase. Depending on the shape of your vase you may need more or less tape. For my vase, I ended up using about five strips because of the curvature of the vase.

 2.) I started my twine at the top, and honestly you couldn't tell where I started the twine once there was I had wrapped it around a few times.
 3.) Near the end I used a couple more pieces of double sided craft tape to secure the twine in place.
 4.) You could either leave it plain for a more nautical feel, or dress it up more like I did for a more rustic design.
5.) To finish it off make sure you add your favorite flower!

~Taryn

Monday, June 23, 2014

DIY: Confetti Poppers!

This weekend, my husband and I hosted a gender reveal party for our new little baby due in November. With our daughter, we had a bakery create a gender reveal cake with pink frosting on the inside (although we didn't know what color it would be). However, this time, my husband wanted something a little more exciting. He was really pushing for a firework... however, that involved a little too much set up and clean up. So instead, we agreed on confetti poppers. So last week my mom and I created two different sets of confetti poppers with both pink and blue confetti. On Friday we had our ultrasound and had the technician put the sex of the baby in an envelope, and on Saturday we found out with family and friends as we popped confetti all over our driveway! Below I've shown how simple it is to make these poppers. They would be great for any occasion; including 4th of July, wedding send-off, or birthday party.

Supplies:
  • Wilton Treat Pops Display Set
  • Scrapbook paper
  • Cupcake Wrappers
  • Tissue Paper
  • Ribbon
  • Mono-Adhesive (or glue)
I started off this project by wrapping each Wilton Treat Pop with scrapbook paper, simply so that people couldn't see what color the confetti was on the inside, and since the whole tube is clear I decided to stuff the bottom of the tube with some tissue paper as well.


I then added the confetti, before topping the tube off with two cupcake wrappers (it was more sturdy with two and less see-through). To keep the cupcake wrappers on, I tied a ribbon around the wrapper to hold it in place.

When it was time for the reveal, we counted to three, and everyone hit the bottom of the Treat Pops, which in return made the cupcake wrappers fly off as well as BLUE confetti!


We are so excited to welcome a little boy into our family in November, and hope that after reading this you too, can create some of your own confetti poppers!

~Taryn

Thursday, March 6, 2014

DIY Thank You Cards

Ever since I was a child, my mother has always instilled a DIY attitude in me, especially when it came to card making. I don’t think I’ve bought a card since I was around nine years old.  Although card making does have an initial start up cost (that does cost more than a single card), it won’t take long until you can actually save money by creating your own cards. Also, can you think of someone who doesn't like receiving a handmade card in their mailbox? One of my favorite methods of generating thank you cards is rubber-stamping. After the start up costs of a few rubber stamps, the only thing that needs to be bought on a routine basis is paper and embellishments.

If I’m creating a mass number of thank you cards, I try to keep it fairly simple, so I can both keep my costs down and also cut down on the time devoted to the cards. However, efficient card making doesn’t have to look cheap.

I recruited my mom for this tutorial to help show that your bridal shower or wedding thank you cards can be both beautiful and cost efficient.

Bicycle Card
The first thank you card we created was most likely the simplest thank you card you could get, but isn’t it spunky and cute? This bicycle and “thank you” were stamped, while we used a mini paper punch to create the tiny hearts. Draw little squiggly lines, attaching the bike to the hearts and wah-lah, you have a thank you card!

Flower Card
This card was a little more in depth. We used a total of four stamps; a flower, background lines, splatter paint, and “A million & one thanks.” We also incorporated one of my favorite stamping accessories… dimensionals! For those that are unaware, a dimensional is a little foam shape that is placed under a piece of paper to add… you guessed it… dimension. On this card we used the dimensionals under the flowers and added a little pearl in the center of each flower to enhance the design.  Because these flowers coordinated with a hand-held punch, this card required very little work and was very simple to put together.

Designer Paper Card
If you find some designer series paper you like, whether it be from a box store or a personal crafting consultant, you can easily coordinate this card using your own designer series paper to guide you in your choice of both color and stamps. In this specific card we layered the designer series paper on some solid colored cardstock and finished it off with a “thank you, you’re the best” stamp and a little bit of ribbon.

Lobster Card
If your wedding or shower has a theme, try incorporating that into your thank you cards. This card in particular would work great for a nautical themed event. We used the bold lobster stamp to create an eye-catching focal point. In this card we used four simple rubber stamps with some bakers twine, which is very popular lately.

As you can see from these four cards, rubber-stamping doesn’t have to be difficult or time-consuming. Each one of these cards took less than five minutes to create. So whether you are making one or one hundred it’s worth both your time and effort.

~Taryn


All stamped images are copyright of Stampin’Up! 

Thursday, February 13, 2014

Super Easy DIY: Will You Be My Bridesmaid?

Have you seen the "Will you be my bridesmaid?" gift trend going around? Well, here's a really easy and meaningful DIY way to make some for your girls!


Supplies:
- Two different colors of washi tape, in your wedding color scheme (can be found at Paper Source)
- An ink pad
- A paper tag (can also be found at Paper Source)
- One small kraft paper box (I got this one at Michael's)
- Some "filler" shreds of paper. Or you could use fabric.
- Small piece of paper to write a note on.
- A small, very special gift (I chose a sterling silver ring)
- A marker
- Scissors


1. Cover all four outside edges of the kraft paper box with one of the colors of washi tape.


2. Open the ink pad and press it firmly onto the top of the box. Careful, it takes a while to dry. 


3. Cut hearts out of the second color of washi tape. Place them in a cluster, anywhere on the top of the box.


4. Also ink the paper tag (the more gold the better!)


5. Add some personal touches! Write a special note on the card inside and your friend's name on the tag. Tape the tag to the box and voila!


There you go! An easy DIY for your future bridesmaids. Definitely add your own twists to it, like using your wedding colors and choosing specialized individual gifts for each girl. 

Send us your DIYs! Tag your photos #joieDIYfun on Instagram! 

~joie mag team